
Bonus: This is now available in a PDF Downloadable Tutorial for only $4.00 Click Here
My cousin Randy asked me if I ever make hot pads or oven potholders? He said he doesn't like the glove style oven mitts. So I decided to make Randy a hot pad for this week's Hodgepodge Patchwork Tuesday.
My cousin Randy asked me if I ever make hot pads or oven potholders? He said he doesn't like the glove style oven mitts. So I decided to make Randy a hot pad for this week's Hodgepodge Patchwork Tuesday.
So here is my quick version of how to do "quilt as you sew"
to make a fast hot pad...
I cut a piece of heat resistant batting in a 9 inch square.
Then I cut the backing fabric in the green tye dye fabric about 12 inches square. I wanted to make sure it was at least 1 1/2 inches larger on all four sides. Place the backing fabric with the wrong side of the fabric up against the batting.
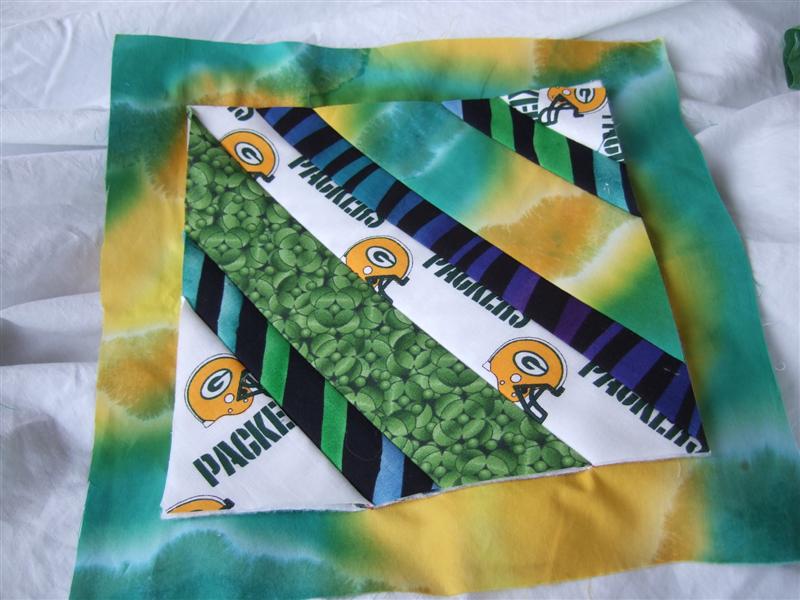
Then I just grabbed some strips from my strip drawer. Some were 1 inch wide and some were 2 inches wide and some weren't even cut straight.
Follow along with the photo instructions....Place strips on batting with the pretty sides together and stitch. Then press open and flat. The add next strip and next strips until you have the batting covered.
 |
| Hot pad/pot holder |


Flip is over so you can see the back stitching lines.


you have 1 1/4 inches on all four sides.


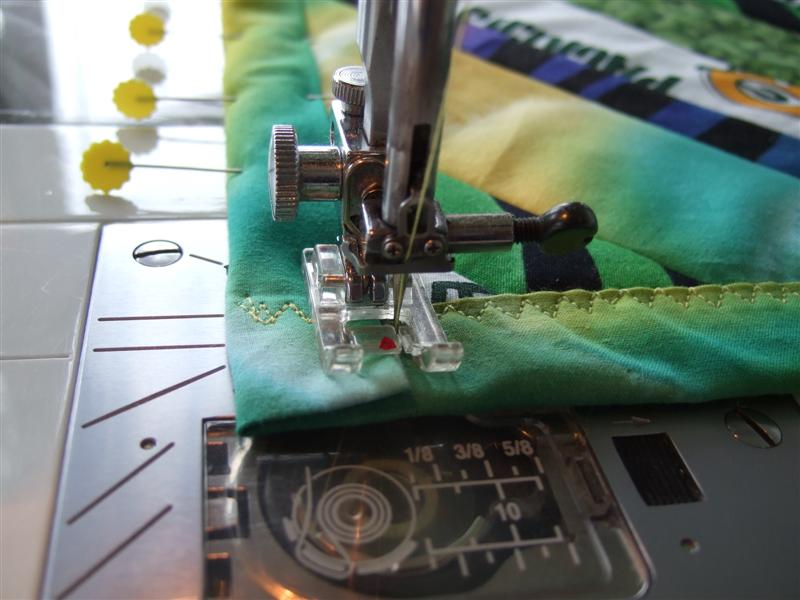
I use a Zig Zag stitch as I feel it holds best and is forgiving if you don't sew perfectly straight. You could use an embroidery stitch also. See how I stitched the corners in the next photos.


You could use this method of quilting to make place mats and table runners. It gets a little tricky keeping the back flat the larger you make something.
Share your ideas in the comments... love to hear from you!
Thanks for following along!
Marcia
Linked with
Get Your Craft On --- Today's Creative Blog for September 14, 2011
Gwenny Penny's Point of View Linky Party for September 23, 2011
Sew Many Ways : Sew Darn Crafty Week #36 - Oct. 16, 2011
Chef in Training - Tuesday Talent Show #8 - Oct. 18, 2011
Pieceful Life Little Quilts Monday - Oct. 24, 2011
* NOTE: I am sharing a construction method for making a Hot Pad or Potholder. This is not a pattern and I did not get the pattern from somewhere else. I am just sharing how I do "quilt as you sew". Have fun making this sewing project. Any questions email me at Marcia@craftysewing.com.
10 comments:
Thank you for a nice quick project. Nice idea to make some 'manly' potholders for the backyard BBQer.
How fun! I can't wait to try it!
My husband has done some awesome potholders.. I felt like I was watching him making them reading your blog - I love it... Although our team would be Giants for me and STINKY Dolphins for Jorge - I hate Miami and I am NOT shy about that. Mega sport girl I am lol... Anyways sorry off my soap box lol - these are super great. I have to ask to you poke yourself as much as Jorge does?
Evielynne
Thanks for the tutorial! I've actually been wanting to try making potholders with some fun new "kitchen" fabric I've added to my stash :)
Great project! I might have to make myself some too. :)
I've never done quilt as you go. I am going to have to extend May for Me somehow to fit all your projects in because I now have several that I want to try!
I've seen this done before and have been wanting to try it. Thanks for the great photos.
Thank you so much for the Idea. I think I am going to try this out. I have always had issues with the edges. Now I can see just how to do it.
Great tutorial....I like the way you did the binding and used the zig zag stitch : ) Thanks for linking up to Little Quilt Monday! I will definitely have to give this a try.
http://piecefullife-elizabeth.blogspot.com/2011/10/little-quilt-mondayfall-wavy-tumbler.html
I just saw this! Thanks for an awesome tutorial.
Post a Comment