Update: This tutorial is now available in as a PDF Downloadable Tutorial.
Click Here is the link to all of my PDF Downloadable Patterns
Part Two side seams, inside binding for side seams, and pockets and bottom tucks
Place pretty sides together and stitch both side seams. (1/4" to 3/8" seam allowance).

 |
| Inside pocket - bind top and bottom |
If you want an inside pocket, follow the next few steps
before you stitch the side seams. Pocket will show on the photos, so if you aren't adding pockets note that you will see them in the photos from this point on.
Bind the top edge and the bottom edge of the pocket.
 |
| stitch side of pocket to body |
Then place the pocket on the body of the bag close to the top just below the straps.
Note: your sides seams are NOT sewn yet. Stitch on the sides and on the bottom edge of the pocket to attach it to the bag inside.
Also stitch thru' the pocket to divide the pocket into sections. See next couple photos.
 |
| stitch bottom of pocket to body |
 |
| stitch to divide pocket into sections |
 |
| stitch some pockets shorter for pens and finger files |
 |
| stitch the sides seams |
 |
| Binding for the inside seam |
Stitch a binding strip on the inside seam. (3/8" seam allowance) Leave 1 1/2" stitching out at the top edge. Do this to both side seams. See the next photo for trimming the bottom edge about 2 1/2"to 3" from the bottom.
 |
| Trim binding about 2 1/2" to 3" from bottom |
 |
| First part of binding stitched to inside of bag |
 |
| Flip over to stitch and trim see next photos... |
 |
| Trim bulky spots so the binding will be able to wrap around it |
 |
| Fold top edge of binding down and stitch see next photo... |
 |
| Stitch to tack top edge of binding down |
 |
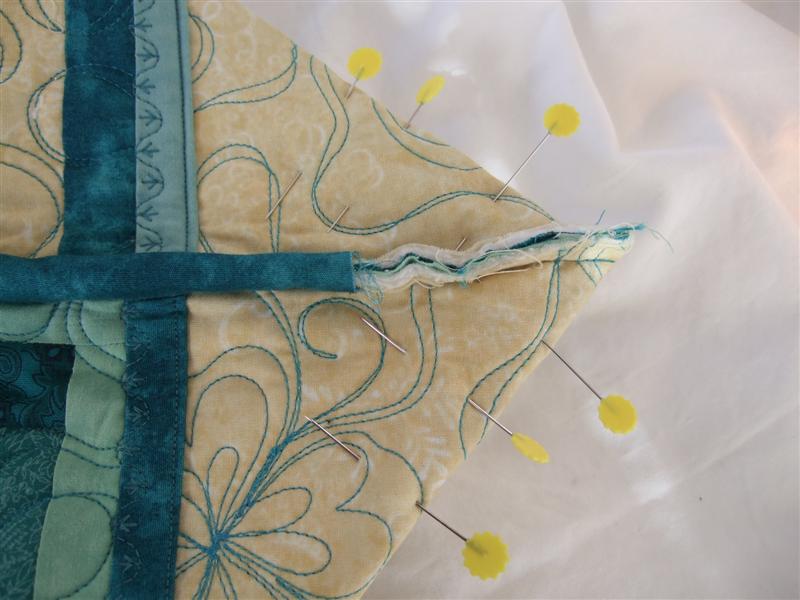
| Fold over the binding and pin see next photo |
 |
| Pin in place before stitching |
 |
| Stitch the top edge of the binding see how much on next photo |
 |
| Stitch about 1 to 2 inches to tack down top edge of binding |
 |
| Then pin and stitch the binding from the bottom edge to the top. |
 |
| The bound seams should look like this |
 |
| Stand the bag upright so you can make the tucks in the corners |
 |
| Pin the tucks for the corners flat so you can stitch across to form the bottom tuck |
 |
| Stitch twice and then cut away the extra |
 |
| Trim the excess bulk at the seam |
 |
| Stitch a binding strip on the trimmed tuck with 1 1/2 inch sticking out on both ends |
 |
| check if it will fold over - trim if needed |
 |
| fold over and stitch/tack both ends down |
 |
| fold over binding and pin in place and stitch |
 |
| Stitching should look like this |
 |
| Turn bag inside out and your bag is completed! |
I will do another post tomorrow night with several measurements for cutting and finished bags. This size finishes to a bag that is about 11 inches tall and about 11 inches across and has an 8 inch wide opening on the top. See the photos below.
The original quilt was made using my
Easy to Sew Quilt Pattern. It lets you create an artsy type of quilt without figuring out where the colors and pieces should be placed. Fun and easy to make!
Special orders contact me at Marcia@craftysewing.com
Any questions contact me at Marcia@craftysewing.com
Info about April Giveaway next post!


2 comments:
This is great! I wish I had a quilt to use so I could make my own. :)
Thanks for taking the time to take all those photos. I am anxious to get started!
Post a Comment