Thoughts and photos shared by me ... Marcia. I am a professional modern freestyle long arm quilter and a fiber artist, a photographer, and a novice gardener. I love to create quilted items using old and new fabrics. I am also a mother, a daughter, a friend, a wife and a Grandmama! I am a blogger and I share it all here... Welcome!
Wednesday, December 21, 2011
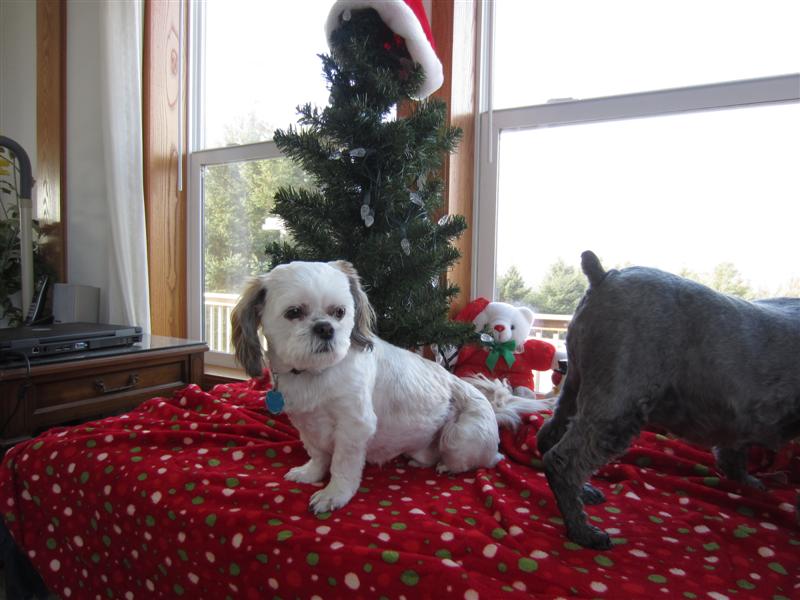
Wordless Wednesday - Trying to take a Christmas Photo
Linked with:
Blog Paws: Wordless Wednesday for Pets - Dec. 21, 2011
Wordless Wednesday.com - Dec. 21, 2011
Labels:
My dog - Gabby,
Toby,
Wordless Wednesday
Minutes for Me Linky Party #7 and a Feature!
This is an incredibly busy time of year for everyone. Are you taking any "Minutes for You"? Just 5 minutes, 10 minutes, or even just a few minutes?
This week, I created a Mix and Match Quilt for a last minute gift. It was also my Minutes for Me, because I took time to play and create!
Thanks to all who linked up their posts last week!
A Feature from Party #6
The most viewed post last week was the Tree Runner Tutorial from Connie at Quilting by the River. She also shared a tutorial on her blog for a tree mug rug. Connie was recently a guest blogger at Sew We Quilt too. Hop over and check out her blog.
Connie please add the "Featured at" Button to your blog sidebar or a featured at page. Right click and save the image. Then go to Add a Gadget and add it as a picture and include this link to add to your sidebar. http://marciascraftysewing.blogspot.com/
It is already sized to a button size of 150 X 150 pixels.
Follow the simple Guidelines for sharing at the Minutes for Me Linky Party:
1. Link your post URL and not your whole blog. The URL is for your specific post.
Thanks for sharing here on my blog!
Follow the simple Guidelines for sharing at the Minutes for Me Linky Party:
1. Link your post URL and not your whole blog. The URL is for your specific post.
2. Please display a visible back link or my button in your post to this party or it will be deleted. Back links will be required in order to link up. Add it first before linking up. So grab my link first and add it to your post, then link up.
3. Be a follower of this blog, so you can link up every week.
4. Take a moment and visit some of the other participants.
5. Please - No advertising or etsy links.
6. You can share an old post or a New post. Make sure you have a back link in the post.
7. Party starts on Wednesday at Noon and ends at Noon on Monday-Central Time. On Wednesday, I will share a couple featured "Minutes for Me" posts.
This is my "Minutes for Me Button".
It is sized to 150X150 pixels for your sidebar or for in a post.
On Blogger Blogs: Right Click and save the photo first. Add it under Gadgets, as a Picture, with this link http://marciascraftysewing.blogspot.com/
Marcia
Labels:
Minutes for Me Linky Party
Tuesday, December 20, 2011
Hodgepodge Patchwork Tuesday - Mix and Match!
Do you need one more Christmas Gift?
Create a Mix and Match Hot Pad or Place Mat or Table Runner Quilt.
It's fast, easy, and looks cool.
Oh and it is a practical gift.
Choose a focus fabric and then add colors to mix and match. They don't have to be perfect - just mix and match!
Iron/Press Lite Heat 'n Bond onto the wrong side of the fabric scraps.
This is my focus fabric. I added the dotted fabric and quilter's blenders fabrics in matching colors.
After the Heat 'n Bond dries, cut your fabric into rectangles of assorted sizes.
Peel the paper off the backs.
Place the rectangles on a background fabric. I chose a bright yellow - Quilter's Blenders Fabric for the background fabric.
Cut another piece of fabric the same size for the backing fabric for your quilt. Cut a piece of batting one inch smaller than the backing fabric.
Iron/Press the rectangles onto the top yellow background fabric.
I used the yellow as it is easy to see. I would suggest choosing a busy fabric for the back, that way your start-stop stitching won't show.
Enjoy your day!
Marcia
Create a Mix and Match Hot Pad or Place Mat or Table Runner Quilt.
It's fast, easy, and looks cool.
Oh and it is a practical gift.
Iron/Press Lite Heat 'n Bond onto the wrong side of the fabric scraps.
This is my focus fabric. I added the dotted fabric and quilter's blenders fabrics in matching colors.
After the Heat 'n Bond dries, cut your fabric into rectangles of assorted sizes.
Peel the paper off the backs.
Place the rectangles on a background fabric. I chose a bright yellow - Quilter's Blenders Fabric for the background fabric.
Cut another piece of fabric the same size for the backing fabric for your quilt. Cut a piece of batting one inch smaller than the backing fabric.
Iron/Press the rectangles onto the top yellow background fabric.
Place the top of the quilt on the batting with the pretty sides facing out. Stitch about a half inch from the edge all the way around the quilt on all four sides. You are going to leave the edges raw.
Trim the outer raw edge to about a 1/4 of an inch. If you would like to stitch around it a second time you can. You could even stitch the edge with an embroidery stitch.
Start stitching each of the rectangles in place. I stitched about 1/8 inch from the edges. Whatever looks eye pleasing to you.
Trim all loose threads on the front and the back.
I used the yellow as it is easy to see. I would suggest choosing a busy fabric for the back, that way your start-stop stitching won't show.
That's it! You are done! You can wash it and dry it to get the edges to fray a little if you would like.
Enjoy your day!
Marcia
Save the Date:
January 17, 2011
Scrappy Quilt Challenge<-Click here for details.
Linked with:
Subscribe to:
Posts (Atom)